Sunday, December 4, 2011

The Turducken Project

For many people, a turducken is a mythical object, an unfathomable creation, an urban legend. But for those in the know, a turducken is an extraordinary feat, a magical amalgamation of meats and stuffings, a transcendent Thanksgiving experience. Up until a few weeks ago, I fell into the former category; now, I can proudly declare myself a member of the latter.

To dispel a few myths, I honestly do not think making a turducken is quite as challenging as rumors may indicate. Sure - de-boning is a long and arduous process and you are guaranteed to encounter many obstacles along the way, but fortunately, the process of de-boning one turkey only took about an hour! Furthermore, there are many shortcuts that can be taken in the process of assembling a turducken - which I gladly took - and I think my turducken still turned out quite turducken-y.

For starters, I did not use a whole chicken. Considering that the chicken is tucked away inside a turkey, duck, and 2 layers of stuffing, I really did not see any point in using a whole chicken (and taking the effort to de-bone this tiny bird). As a time saver, I used 4 boneless, skinless chicken thighs and pounded them into a thin layer. Alternatively, you could use 2 chicken breasts to minimize the number of distinct parts you are using, but I personally prefer the rich, moist flavor of dark meat (another reason why I chose not to use a whole chicken).

To save even more time, you can also use skinless duck breasts instead of a whole duck. I personally wanted to use a whole duck so that I could maximize the duck flavor and content, but thanks to my lack of experience with de-boning, I ended up using 2 duck breasts, pounded thin. I really wish I had been able to use the entire duck since, out of the 3 meats, I infinitely prefer eating duck, but you gotta do what you gotta do!

You have to use a whole turkey. There is just no way around it. And you must be careful with the de-boning and make sure you do not pierce through the skin...so if I were you, I would choose to also use at least a whole duck or whole chicken so you can first practice de-boning on these smaller birds. Remember that, ultimately, the duck/chicken will be wrapped inside the turkey, so even if you mess up, no one will notice.

For my turducken, I used a 10 lb turkey, a 5 lb duck (though only the breasts managed to make their way into the finished product), and 4 chicken thighs. I chose a smaller turkey so that I would be able to easily lift it on my own, but if you have more strength than me and/or kitchen helpers, I would recommend you choose a slightly larger turkey.

Before you begin, make sure all of your meats are thawed so that you can easily de-bone and you do not freeze your hands off while de-boning. Also make sure you have a sharp and sturdy boning knife on hand. Prepare your work-space and make sure you have plenty of room. I chose to cover my kitchen counter with saran wrap for easy clean-up, and I have to say it really came in handy - I would definitely recommend doing this!

Whip out the first bird you plan to de-bone. In my case, this was the duck. Before you begin de-boning, make sure you thoroughly read up on the process and steps to de-boning, so that you can avoid some of the silly mistakes I made. Even though the duck is meant to be incorporated into the turducken skinless, because I was using this as practice for my turkey, I went through the entire process trying to keep the skin intact.

My 5 lb duck
One of the most important details to pay attention to when de-boning is which side of the bird you are starting on. I began cutting from the wrong side, so after cutting out the rib cage, instead of having one continuous piece of meat, I ended up with 2 duck breasts. It was a sad moment indeed when I had almost finished carving around the rib cage, only to discover that the last portion of to carve away would result in 2 distinctly separate pieces of meat. Oh well!


I briefly considered deboning the thigh and leg meat to throw into the turducken with the breasts, but given how little meat I would have gotten out of those pieces, I chose not to. Plus I really wanted to roast the skin I had cut off of the duck and without any meat, it would have been weird, so win-win!

Duck breasts pounded thin
Thankfully I had already previously considered using duck breasts instead of a whole duck, so I was prepared for this moment. Placing the duck breasts between 2 layers of saran wrap, I pounded the meat so that I would have a larger surface of duck meat to layer onto the turkey and wrap stuffing in. If I had more meat to work with, I probably would not have pounded the duck meat quite as thin as I did so that I could have had a thicker layer of duck to work with (it was probably only 1 cm thick). After finishing the duck breasts, I followed the same procedure for my chicken thighs, and pounded 4 chicken thighs to form a thin layer, approximately 2 cm thick.

The 10 lb turkey
Next up was the turkey. After my duck de-boning debacle, I made sure to carefully read up on turkey de-boning and ensure that I was cutting from the right side. Because this skin needed to be intact, I made sure to cut the turkey very, very carefully.


De-boning the turkey wound up being a lot easier than de-boning the duck because the turkey was much larger and there was a significantly thicker layer of meat to work with.


When it was time to cut away the rib cage from the back of the breast, I admit I panicked again. Even though I had carefully followed the instructions and (I think) had began cutting from the right side, I noticed there was very little meat between the turkey meat and the bone. But given that I had no choice and absolutely HAD to leave the skin intact, using extreme caution, I slowly cut away the bone using tiny strokes. Magically, I managed to cut the rib cage free and leave the meat/skin intact! If you run into this problem when de-boning your turkey, just proceed with extreme caution and you will be fine.


Breaking the wings and thighs from the rib cage was one of the most difficult parts for me, but thankfully my boning knife was quite sharp, so I found a way to just carve through the bone and cartilage. Watch out for any shards of bone attached to the meat - when in doubt, just cut it off! I left the bones in the drumsticks and wings so that they could maintain their shape (and so I could just be done with de-boning).

Success! A de-boned turkey
And voila - the turkey was done!


I placed the turkey in a simple brine of chicken stock, water, rosemary, thyme, salt, and pepper. I'm pretty sure I also added oregano and sage (and whatever else was in the pantry), but by this point it was getting really late and I was extremely tired, so who really knows.

After all the meats were complete, I prepared two stuffings: cranberry, apple, and sage stuffing along with a cornbread dressing. I chose to layer the cranberry, apple, and sage stuffing between both the turkey and the duck as well as inside the chicken, with the cornbread stuffing going between the duck and the chicken.


The next morning, I woke up bright and early to assemble my turducken. After laying the turkey flat, I spread a layer of the first stuffing on top of the exposed meat. I tried to keep my stuffing layer thin so that there would be enough room for the additional layers of meat and stuffing.


I then plopped the duck layer on top of the stuffing and scooped a layer of the cornbread stuffing.


After adding the final chicken and stuffing layer, I was ready to begin closing up the turducken. Since my chicken and duck layers were not one consistent piece of meat, I ended up just rolling up and pressing the pieces together to form a log, which was actually much easier than I had imagined. Once the chicken roll was complete, it was much easier to wrap the duck around the chicken roll.


Once I reached the turkey layer, I quickly realized why people typically buy larger turkeys - it was quite hard to close the turkey up! But with much prodding and squeezing (as well as a lot of stuffing leaking out), I managed to close up the turkey flaps with turkey lacers and some kitchen string.


After slathering the turkey with a cup of butter mixed with thyme, rosemary, salt, and pepper, I tied up the chicken thighs, covered up the neck cavity of the turkey with aluminum foil, and popped the turducken into the oven. I cooked the turducken at 400 F for 30 minutes and then dropped the temperature down to 325 F to let it cook (while also basting every 30 minutes) until the meat reached a temperature of 165 F.


I had anticipated that it would take about 10 hours to cook the turducken, but it actually finished in 6 hours - much too early for my dinner! Sadly, because I wanted to keep the turducken warm, I left it in the oven at 225 F for the next few hours. I think this ended up slightly drying out my turkey meat, but the beauty of a turducken is that since you only get a thin sliver of turkey meat in each slice, overall your turducken still tastes rather moist!


Another major advantage to making a turducken is that the meat is so easy to carve - you just cut slices of the breast! Unfortunately, the layers tended to not stay together in one piece, so I would recommend you place each individual slice directly onto your guests' plates. But all in all, we ended up having a delicious meal and great turducken stories to tell friends and coworkers the next day. Happy eating (and/or Thanksgiving, if relevant at the time of reading this post), folks!

Tuesday, November 29, 2011

Greek-Inspired Pork Belly Bun

Greek-Inspired Pork Belly Bun


After the mouthwatering success of the Korean-inspired pork belly bun (Korean-inspired pork belly bun), I decided to try and find yet another way to take the basic pork belly bun and twist it to incorporate the flavors of another country. And after revising the mouthwatering memories of the Gyro recipe request (recipe wanted: greek chicken gyro), I decided to give it a go!

To me, there are a number of things that make a gyro/souvlaki sandwich delicious:
  • Moist, tender meat
  • Refreshing tzatziki sauce
  • French fries
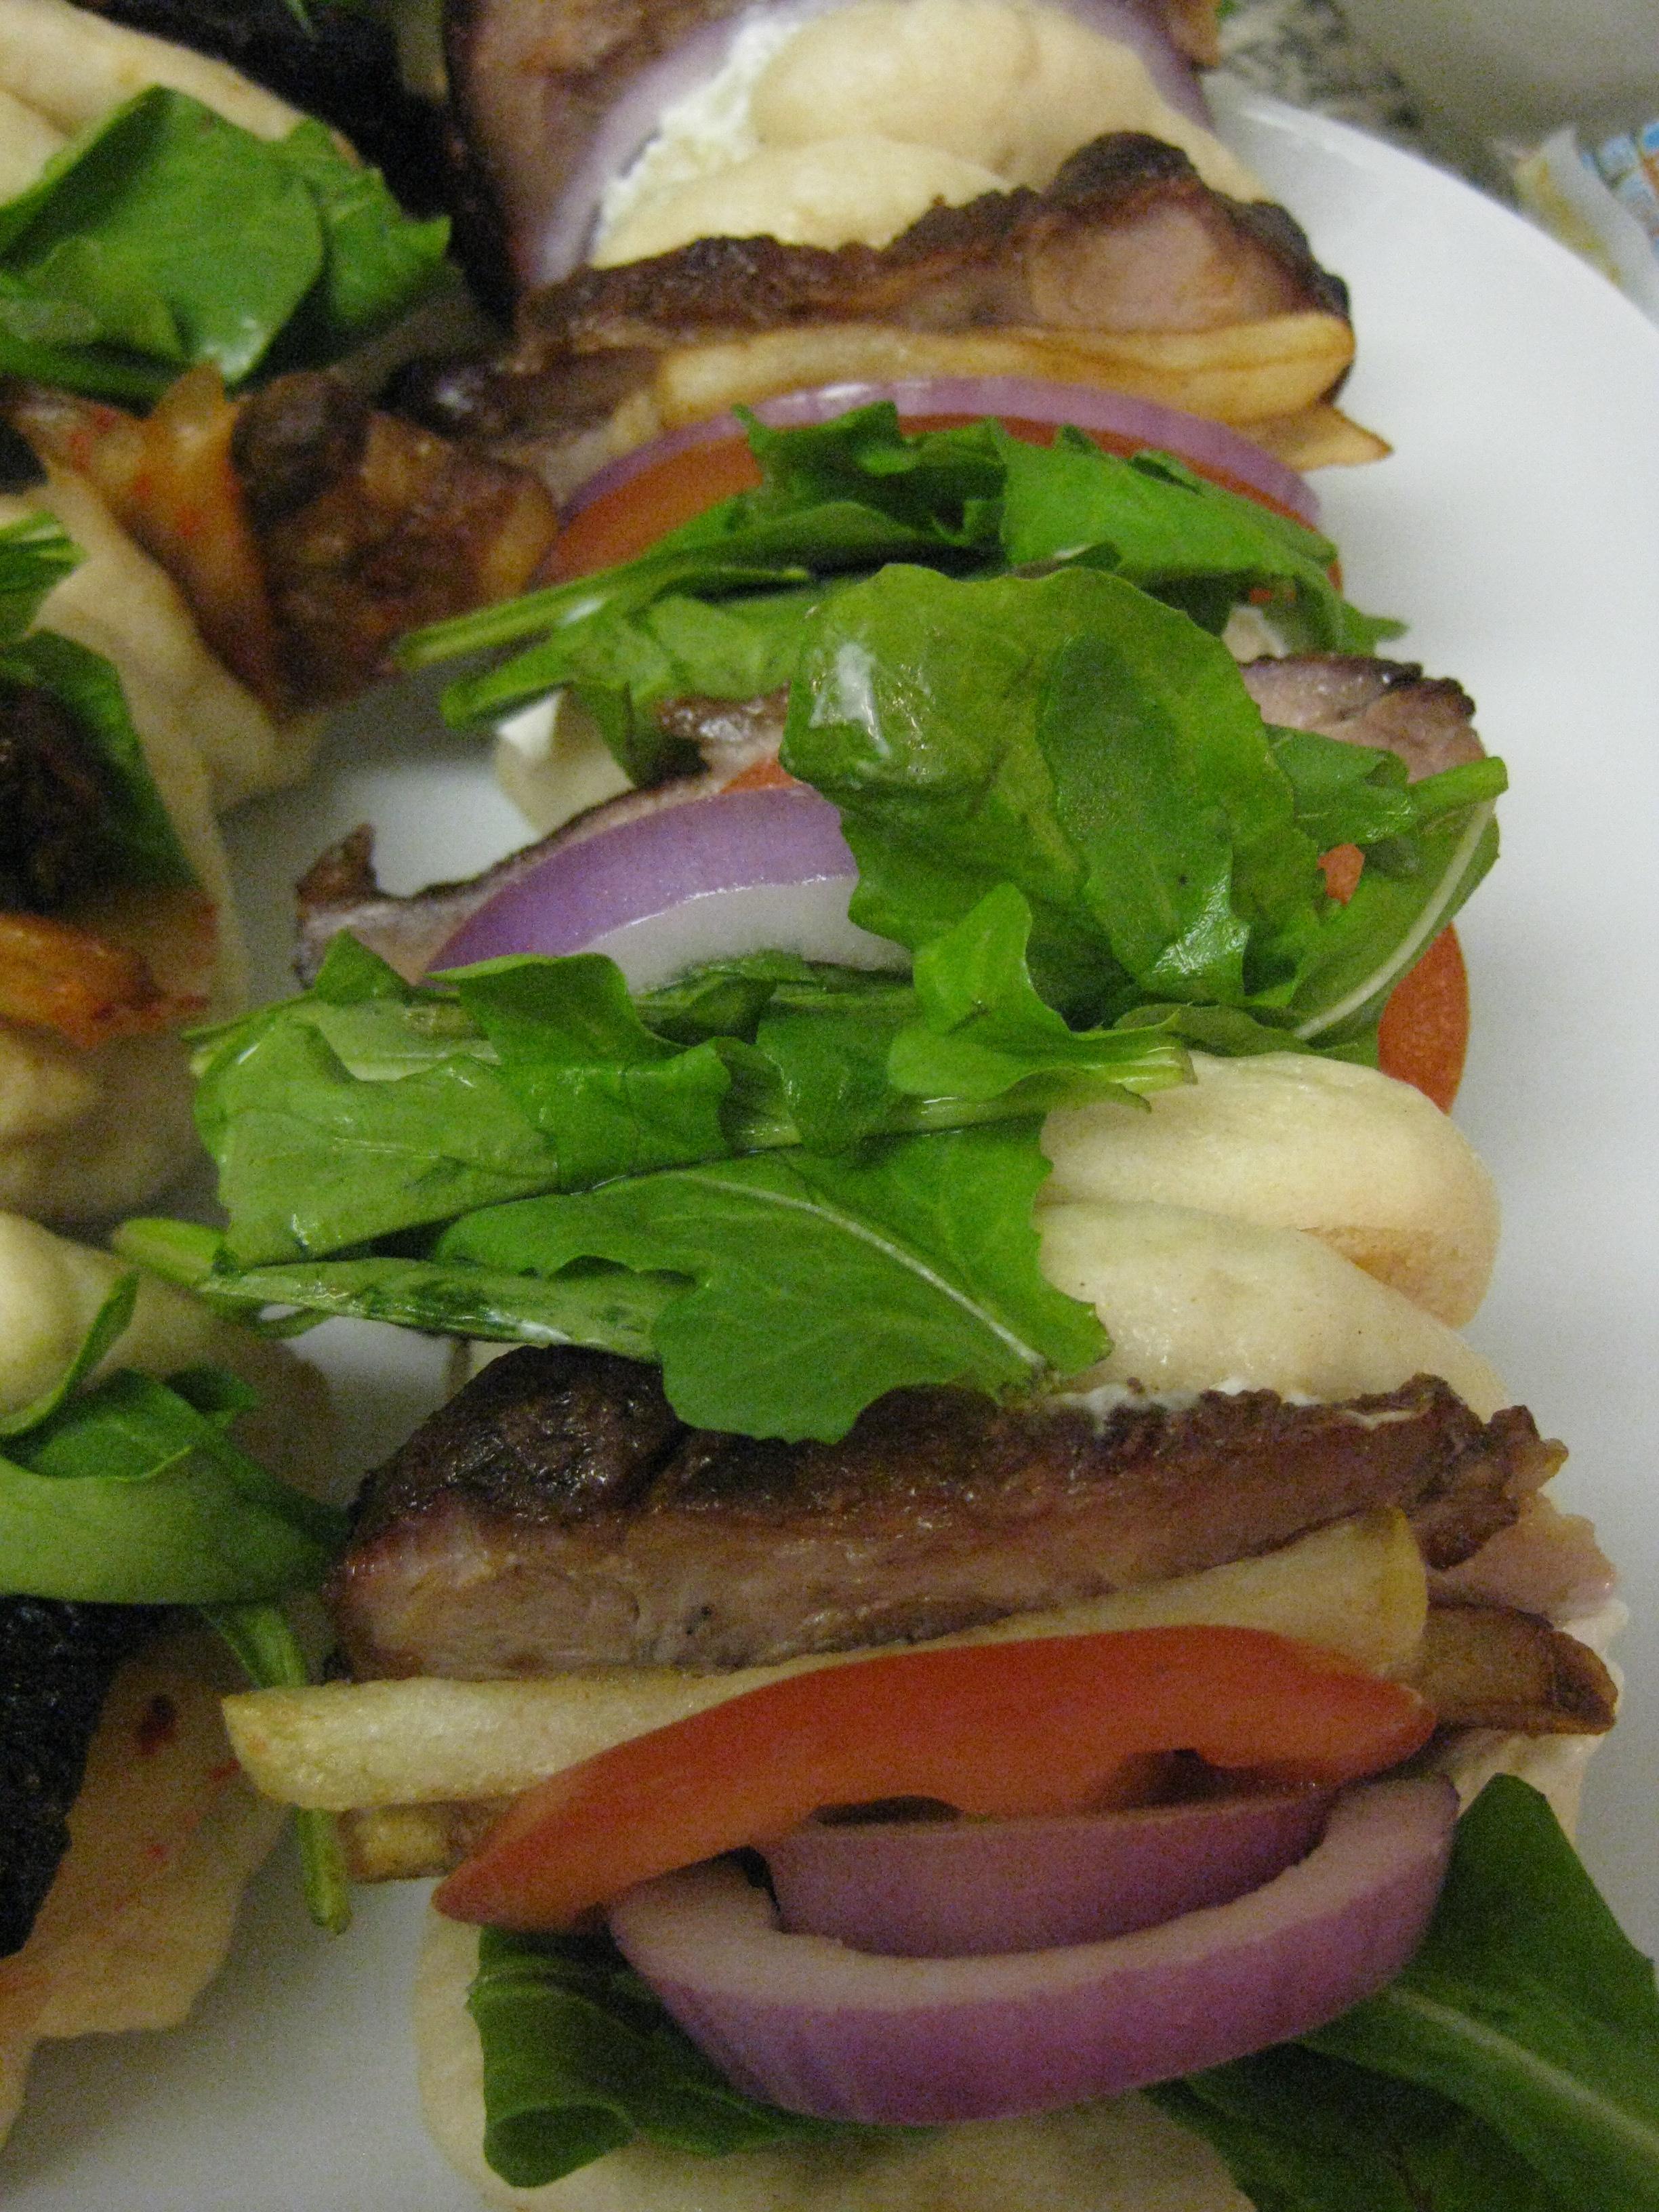
There have been too many instances to count where one of the above went missing...and made for a sad gyro/souvlaki sandwich. Especially the french fries. Though it really doesn't seem necessary, the inclusion of those few hearty french fries gives the sandwich another layer of texture and dimension. Can't do without it. Also can't skip the red onion, though I suppose if you really don't like onions, you can leave it out...

So now that I had the meat (went with the korean-inspired braised pork belly) and the buns ready, all I needed to do was create the sauce and obtain some french fries. For french fries, I went with any old frozen shoestring fries that I found in the frozen foods section, but freshly fried, heartier fries are ideal.

For tzatziki sauce, I used a combination of recipes found online (the end result probably could have been better, but the other elements of the bun were so good that it was hard to notice any flaws in the sauce). Once the sauce was ready, I spread a (generous) layer on one face of the bun, added a few slices of pork belly, followed by sliced tomatoes, lettuce, red onion, and a few french fries. The result?


Delicious.

Tzatziki sauce

Ingredients
  • 1 cup traditional Greek yogurt, plain
  • 1-2 minced garlic cloves (depending on taste preference)
  • 1 tsp lemon juice
  • 1/2 cup grated cucumber
  • salt and pepper, to teast
Scoop the yogurt onto a cheesecloth and let sit overnight in the refrigerator.

Grate the cucumbers and drain the liquid. Mix the dry grated cucumber into the yogurt. Stir in the garlic cloves and the lemon juice. Add salt and pepper to taste. Mix well and serve.

NOTE: My batch of tzatziki sauce was rather sour (I didn't actually measure out the lemon and just took 1/4 of a lemon and squeezed the juice in) so be wary of how much lemon juice you actually add in and adjust accordingly.

Korean-Style Pork Belly Buns

Korean-Inspired Pork Belly Buns


Reflecting on the ever-growing popularity of Korean tacos (recipe wanted: korean tacos) and my own personal fascination with Korean food, I began to think of other ways to integrate Korean tastes into my cooking and realized the most obvious answer (which was also, literally, in front of me at the time) was to create a Korean-inspired pork belly bun! The original plan was just to add a slice of kimchi into the bun, but given how delicious Korean barbecue marinades are, I decided to braise a new batch of pork belly, but this time, with Korean flavors! I incorporated the juice/marinade from the kimchi, hot sauce, sesame sauce, garlic, soy sauce, mirin rice cooking wine, and a little bit of sugar and tossed this mixture with the pork belly into the oven.

After the pork belly was done, I once again set out to assemble the bun. I started with a few slices of kimchi, added a few slices of the pork belly, followed by arugula (the only lettuce I had at the time) and topped with slivers of scallion.

The result? Delicious. The spicy and sweet flavors of the pork belly playing against the kimchi were beautifully absorbed by the soft texture of the delicate bun. Though to some people, the bun may appear to detract from the full taste and experience of the meat and kimchi, to me this combination was delectable, as the combination resulted in a flavor profile that was not overly powerful in any particular taste (unlike how sometimes the spicy flavor of meats or kimchi can overpower everything else).


Korean-inspired braised pork belly

Ingredients
  • 2 lbs pork belly
  • 2 tbsp sesame oil
  • 1/2 cup mirin rice wine
  • 1/2 cup soy sauce
  • 1/4 kimchi marinade
  • 1/4 cup hot sauce (or as much as you would like)
  • 3 tbsp minced garlic
  • 4 tbsp sugar
Preheat oven to 375 degrees. Prepare pork belly (either leave as long strips or cut into 2 inch wide slices, depending on how you want to serve). Heat pan and quickly sear the sides of the pork belly. Remove from heat and place pork belly in a roasting pan.

Combine the sesame oil, rice wine, soy sauce, kimchi marinade, hot sauce, garlic, and sugar in a bowl, adjusting each component to your personal preference. Pour into roasting pan and coat the pork belly. Place into the oven.

Cook at 375 degrees for 1 hour (turning the meat every 30 minutes and making sure the juices have not dried up). Lower to 325 degrees and cook for another 30 minutes. Remove from heat and serve.

Homemade Pork Belly Buns

Homemade Pork Belly Buns


Taiwanese pork belly buns (刮包), simply put, are amazing. Braised pork belly sandwiched between fluffy white buns (also known as mantou or 饅頭) sprinkled with pickled mustard greens, crushed peanut powder, and cilantro...it's really now wonder why interpretations of these buns have been popping up everywhere (think Momofuku, Baohaus, etc.).

Inspired by this recipe request for pork belly buns (recipe wanted: pork belly buns aka taiwanese hamburger), I set out to create my own homemade pork belly buns! Once I had the buns ready (steamed buns part II), the world - or more like these buns - was my oyster. All that was left was to braise my pork belly and prepare the toppings!

For the traditional pork belly bun, I had a few key components I needed to gather before I could assemble the buns and chow down.

First: the braised pork belly. Though I see that Momofuku appears to braise their pork belly in nothing more than salt, water, and chicken broth, I preferred following the traditional Taiwanese style of braising fatty meats.

Next up: pickled mustard greens. Packages of pickled mustard greens can usually be bought in the refrigerated section in Asian supermarkets, though selection may vary.

And then the final 2 (easier) components: crushed peanut powder and cilantro. The peanut powder (which is slightly sweetened) can be found in Chinese supermarkets, most likely in the flour section.

As soon as those 4 ingredients are ready, you're merely seconds away from eating! Assemble by layering slices of pork belly with spoonfuls of the pickled mustard greens, a dash of the crushed peanuts and some cilantro in between a steamed bun. Adjust each component to your personal taste. If you want to, spread a thin layer of hoisin sauce (not too much, or else the flavor will be too strong). Now eat!


Taiwanese-style braised pork belly

Ingredients

  • 2 lbs pork belly
  • ~1/2 cup soy sauce
  • ~1/4 cup mirin rice wine
  • ~1/4 cup brown sugar
  • dash of five spice powder
  • hard-boiled eggs (optional)
  • water
Prepare the pork belly depending on how you want it to cook (i.e. the whole pork belly chunk together versus 2 inch slices ready to insert into pork buns).

Heat the pot that will be used to braise the pork belly. Stir-fry the pork belly in the pot for a few minutes to brown. Add the soy sauce, rice wine, five spice powder, sugar, and water, adjusting to taste. Make sure the liquid mixture fully covers the meat - keep adding liquid until the meat is covered. If you are braising eggs as well, throw in the peeled hard-boiled eggs to stew with the meat.

Let cook at medium heat for 30 minutes. Stir occasionally. Lower heat and continue to cook for an additional 30 minutes (though longer is okay too). Remove from heat and serve.

Stir-fried pickled mustard greens

Ingredients

  • 1 package of pickled mustard greens
  • ~3 tbsp sugar
  • oil
Drain the mustard greens and soak in water for at least 30 minutes. Remove from water and dice the mustard greens.

Heat the pan with oil and stir-fry the diced mustard greens on high heat. Add sugar 1 tablespoon at a time to adjust the mixture to taste. Remove from heat and serve.

Steamed Buns

Steamed Buns Attempt #2 - (Partial) SUCCESS!

So after the horrendous results of my last batch of dough (steamed buns part I), I obviously felt the need to try again. And try again I did!

This time, I learned to cut back on experimentation levels and stick to good old self-rising cake flour (and all-purpose flour for my 3rd batch, just to see what would happen). I would have liked to try another batch with regular cake flour (without baking powder and salt added), but...I can't seem to find it. Next time!

So this time around, I knew the end result would be infinitely better because instead of watching crumbles of dough mixture flop around in the mixer, this time I was able to witness a beautiful and seamless integration of liquid and flour mixture! Exciting stuff!!


Unfortunately, I may have skipped a few steps in the process of making the buns and didn't really bother with rolling out the dough and slicing it - I just formed tiny balls of dough in my hand and flattened it out. I also didn't give the dough much time to rise my second time around, but I did for the third batch and what a difference it makes! I assume this is why my buns weren't as thin as I ideally would've liked them to be or as pretty, but I'll just have to find out next time!

In the end, the buns were satisfying in taste, texture, and functionality (they made great pork belly buns - post to follow!). Now if only they were thinner and more pretty....!

Ingredients
  • 1 1/2 cups warm water (slightly cooled past boiling)
  • 3 tbsp sugar
  • 1 tsp salt
  • 1 1/2 tbsp oil
  • 3 tbsp dried milk powder
  • 2 tsp instant yeast
  • 5 cups all purpose flour
  • parchment paper

Dissolve sugar and salt in 1 cup of the warm water. Stir in yeast. Let it sit for 10 minutes to activate - yeast mixture should look foamy. Add milk powder and rest of the warm water. Stir in oil.

Pour flour in a large mixing bowl. Slowly begin to stir in the liquid yeast mixture to evenly distribute the liquid in the flour. Knead the dough for about 15 minutes. The dough should not stick to your hands and should have a taffy-like appearance when stretched. If the dough is too dry, add a little more warm water; if the dough is too sticky, add a little more flour. Form the dough into a ball and place in an oiled bowl. Cover in plastic wrap and let rise for 2 hours - the dough should grow 2.5-3 times in size.

Punch down the dough (literally punch down into the dough, will slightly deflate the dough). Roll out the dough into a log and slice into 1 inch slices (will probably form around 20). Take each slice and roll out into oval shapes. Lightly spread oil on one side of the oval and using a chopstick, fold the oval dough in half. Place the bun on top of a square of wax paper. Continue until all buns are finished. Let buns sit and rise for another 30 minutes.


Arrange the buns in a steamer, leaving about 2 inches of space between each one. Cover and steam over boiling water for 15 minutes. Remove from steamer after fully cooked and wrap in a moist towel if not being eaten immediately.


Serve with pork belly or anything else you can think of (recipes to be posted soon!)

Grilled Cheese Revival!

For reasons I cannot quite explain, I am the author of many (incomplete) food blogs floating around on the internet. Perhaps I cannot quite commit to just one blog name, perhaps I lack focus...who knows. But for now, I have decided I like this blog. And I feel that this blog could benefit from a few of my previous posts...which I will now re-share with you here!

And in case I ever revive the other blog, the link to the original post can be found here: http://alittletasteof.wordpress.com/2011/04/02/grilled-cheese-revival/

Happy eating!

Truffle Grilled Cheese with Mushrooms and Tomato Jam


When you think of a grilled cheese sandwich, what comes to mind? Childhood days in your elementary school cafeteria, munching on slices of toasted white bread with melted American cheese, coming home on wintry afternoons after endless exhausting snowball battles to your grilled cheese sandwich and bowl of tomato soup, your go-to food in college when you were starving and had no idea what else to cook. But now, possibly thanks to the effects of Gossip Girl and the notorious truffle grilled cheese sandwich incident at the Plaza Hotel, grilled cheese is experiencing its second wind, taking this basic sandwich and dressing it up with as many different flavor combinations as possible. Back in the day, if someone had asked me if I would like to try a $50 truffle grilled cheese sandwich, I would have said they were crazy and shooed them away. Now? Sign me up!

Inspired by the flavor combination presented in this recent grilled cheese recipe request (recipe request: grilled cheese with tomato jam), I was determined to set out and create an epic grilled cheese sandwich. And of course, it absolutely had to include truffles.


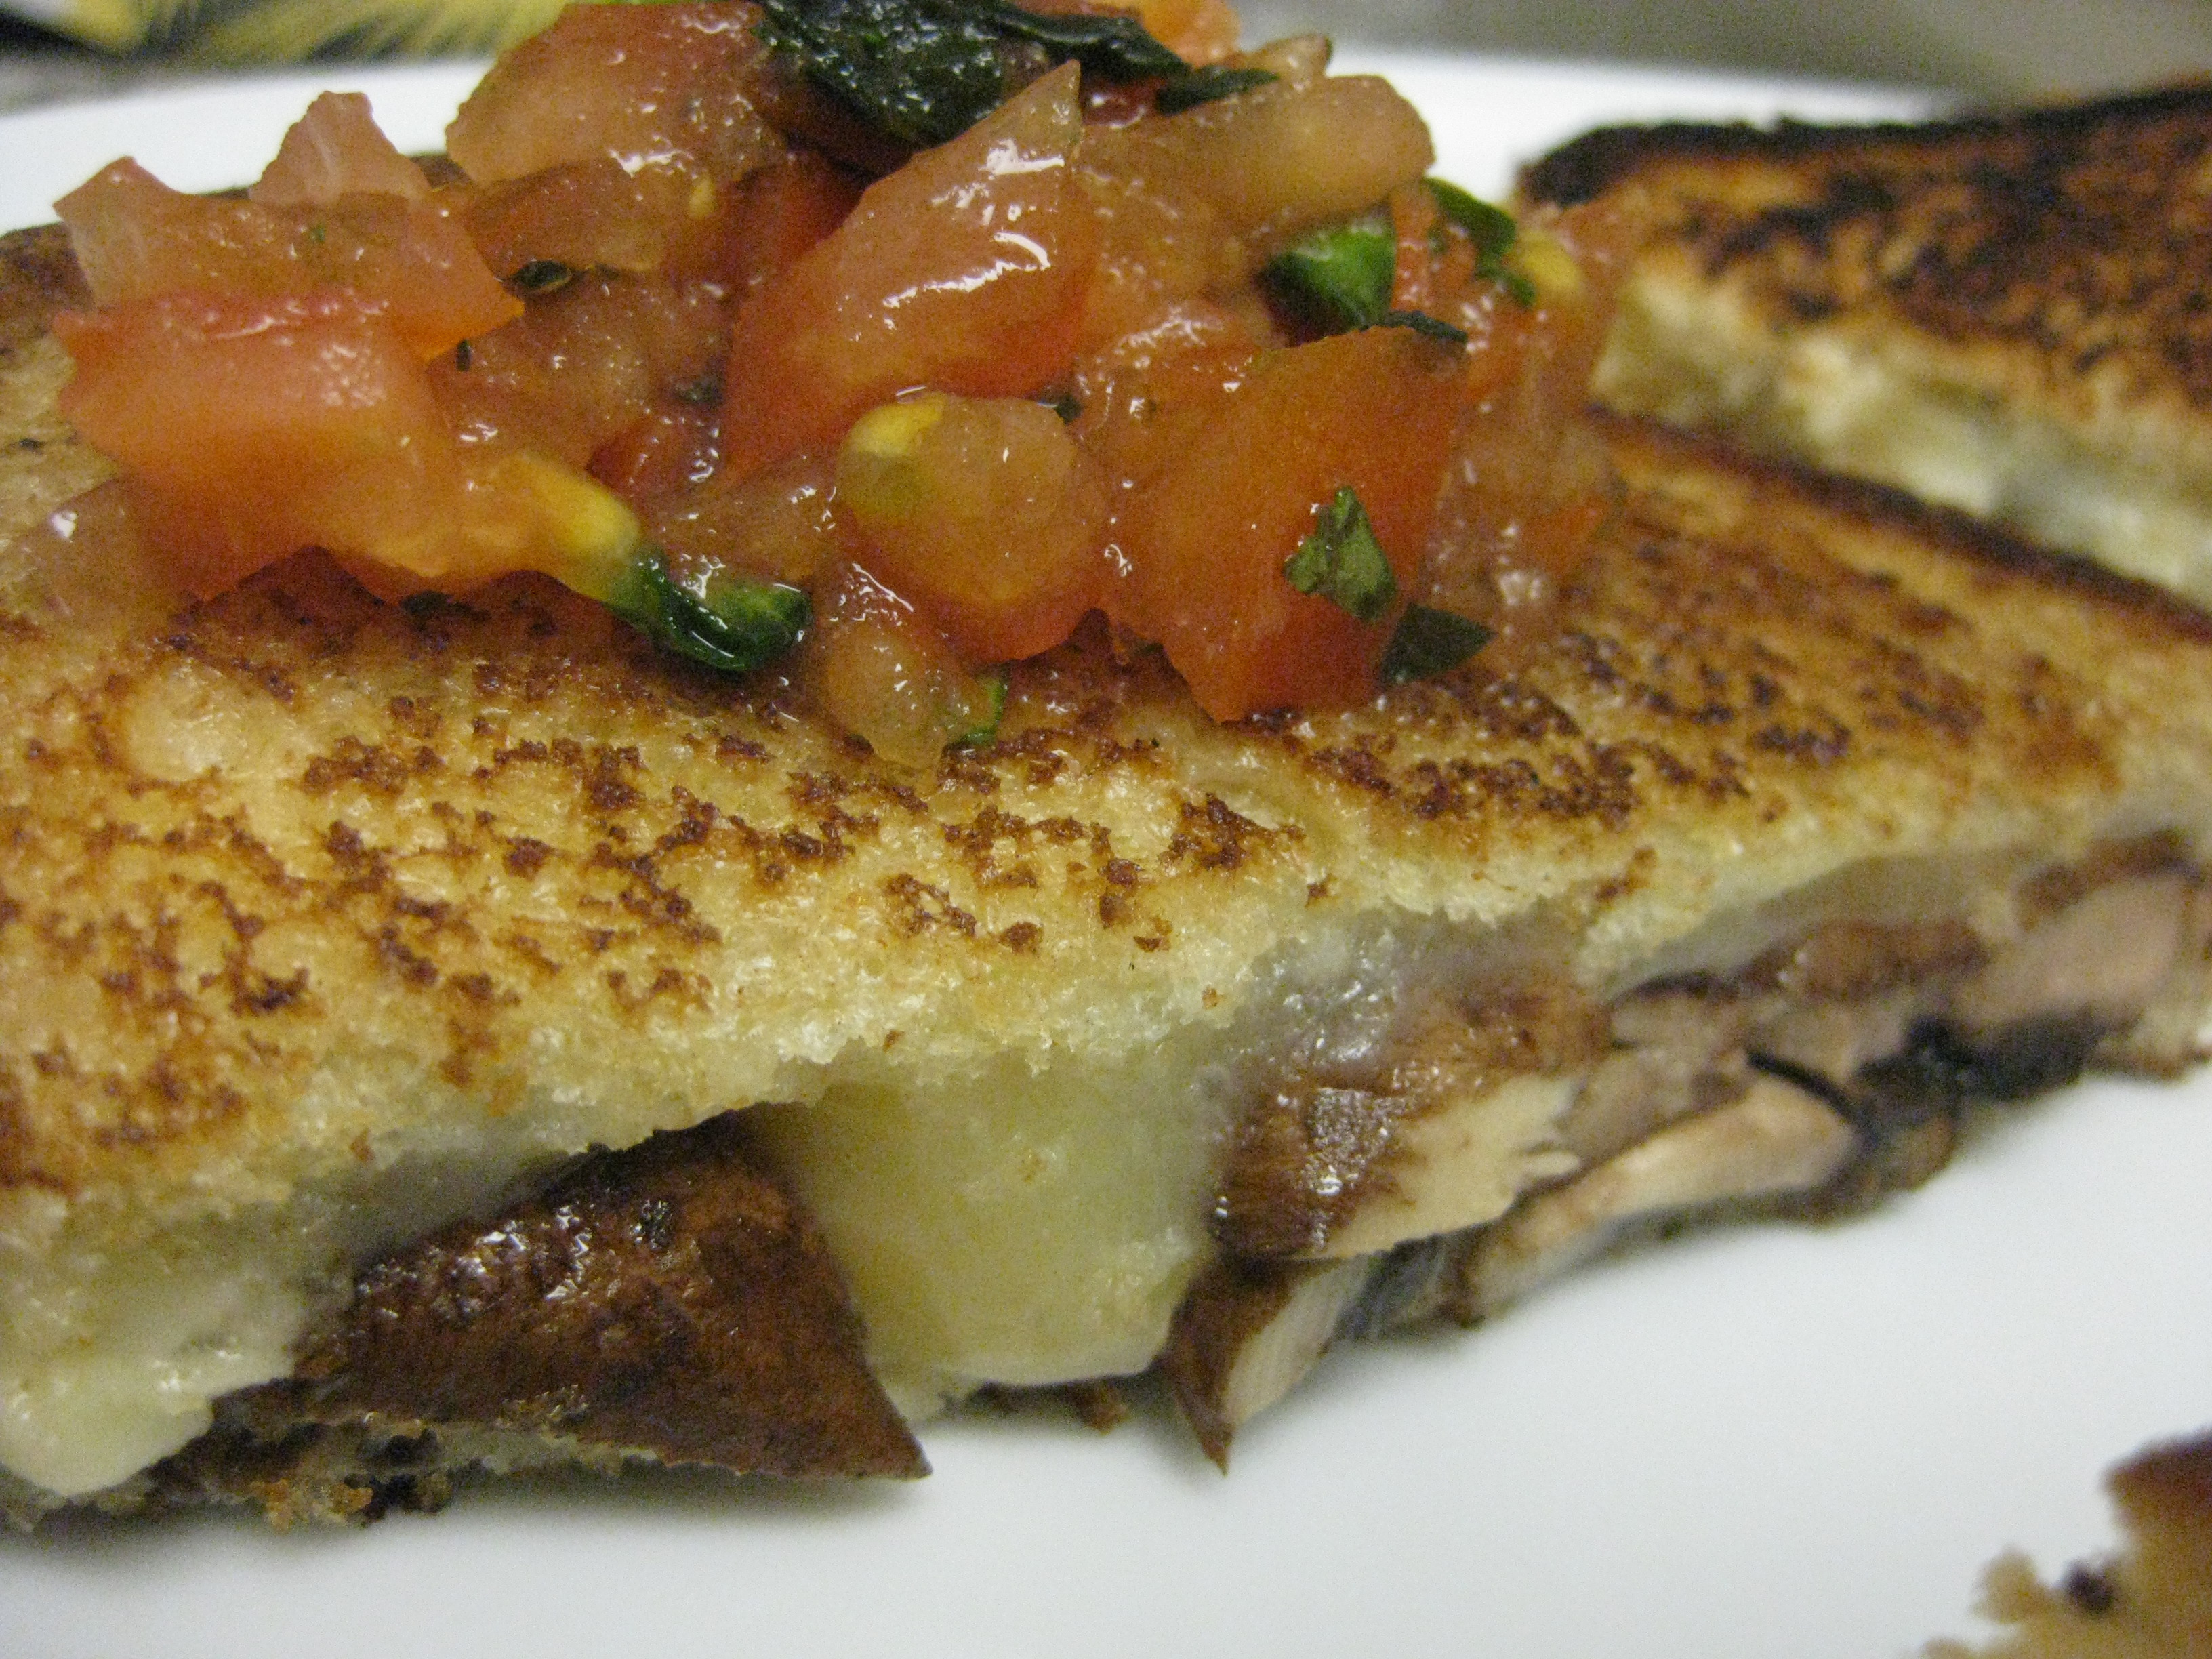
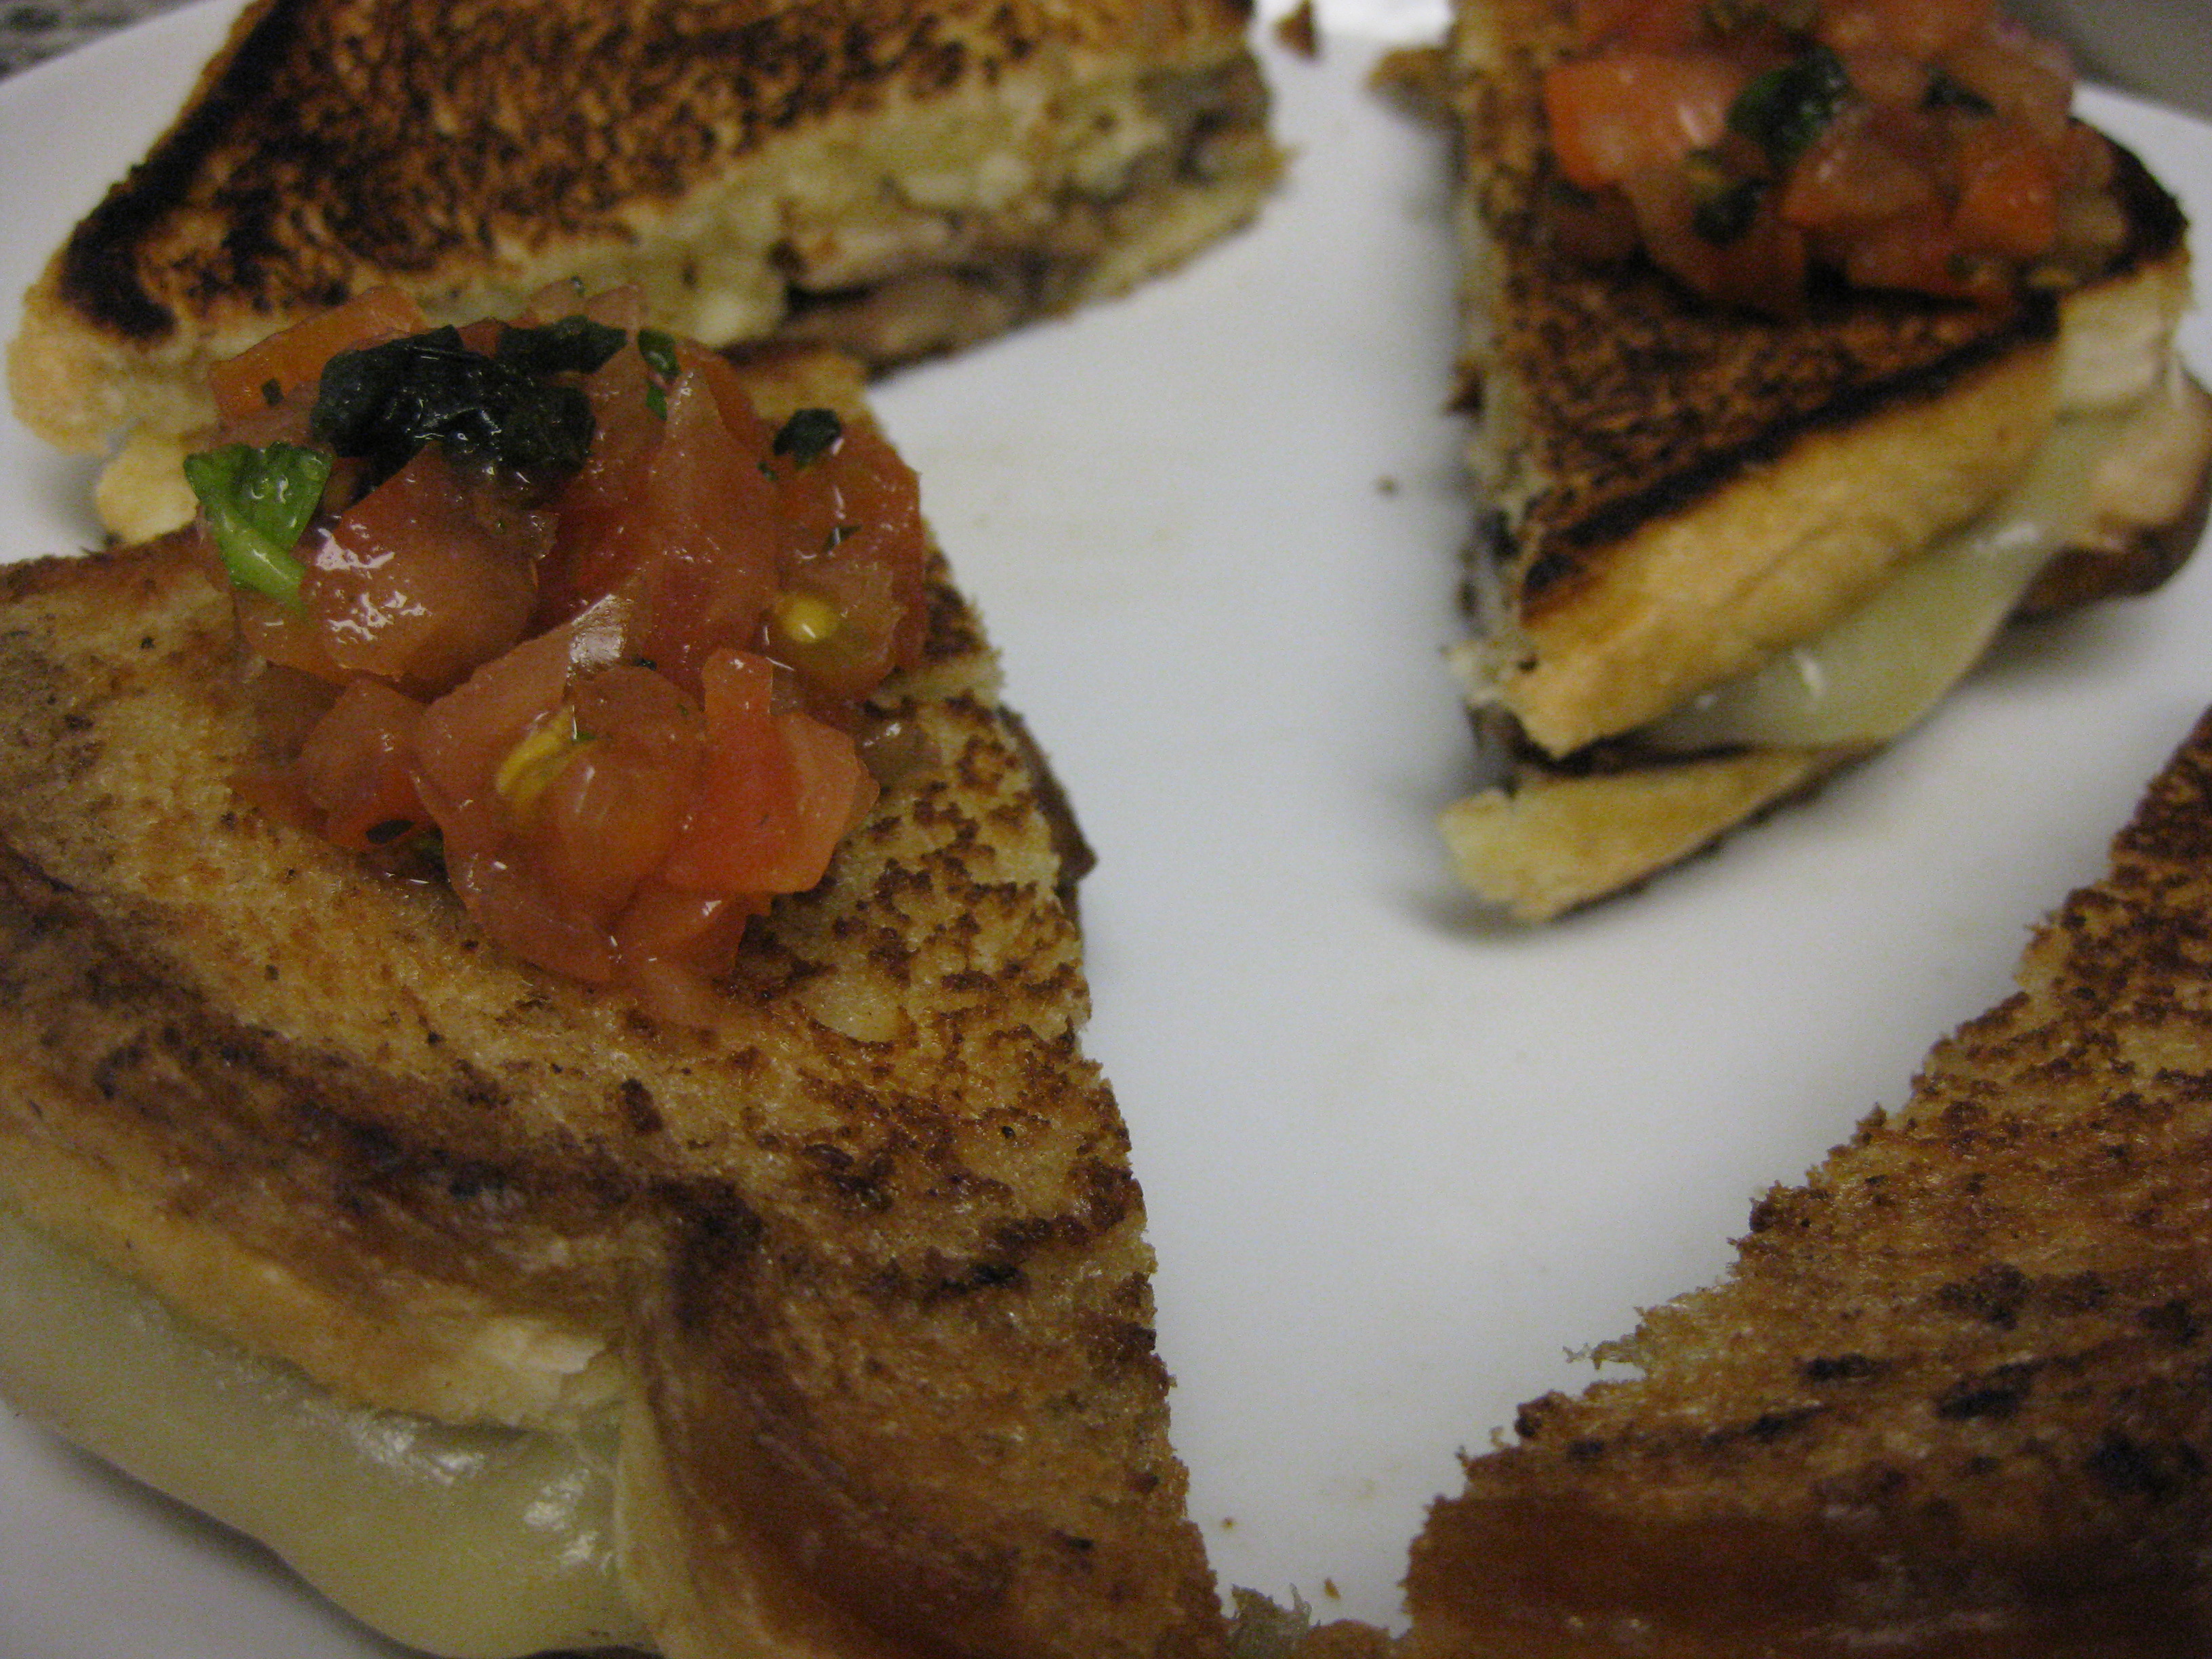
The sandwich on its own is already a rich and comforting delight, with the flavors of the strong pecorino cheese balancing against the light provolone cheese and earthy slices of cremini mushrooms scattered throughout, all enveloped between two slices of warm, buttery, toasted bread - with just a slight hint of truffle oil (note: truffles are really too expensive for me to experiment with!) to really push the sandwich over the edge. When topped with the light tomato salsa, the warm hearty flavors of the sandwich are beautifully cut by the cool refreshing taste and texture of the tomatoes, creating a completely different grilled cheese experience. A mixture of hot and cold, of sweet and salty, of gooey and crunchy - it's the perfect grilled cheese experience!

Tomato Salsa/Jam

  • 1 tomato
  • 1 tsp diced red onion
  • 1/4 tsp diced basil
  • lemon juice
  • salt
  • sugar
  • balsamic vinegar
Finely dice the tomato and mix with onion and basil. Squeeze a sprinkle of lemon juice over the mixture. Add a pinch of salt and slightly more than a pinch of sugar. Pour in 1/4 tsp balsamic vinegar. Mix well.


Grilled cheese with mushrooms, provolone, and pecorino cheese

  • 2 slices of white sandwich bread
  • 2 Cremini mushrooms, sliced
  • 2 slices Provolone cheese
  • 1-2 tbsp grated Pecorino cheese
  • 1 tsp olive oil
  • 1 tbsp butter
  • pinch of sea salt
  • dash of Truffle oil
Heat olive oil in a pan and add the sliced mushrooms. Cook for about 2 minutes, stirring occasionally. Season with a sprinkle of sea salt. Remove from heat.

Melt the butter in a pan on medium-low heat. Pour in the truffle oil (amount at your discretion). Place the 2 slices of bread in the pan. Place the Provolone slices on top of one slice and sprinkle the Pecorino cheese on top of the Provolone. Scatter the mushroom slices on top of the cheese. Take the other slice of bread and place the untouched side face down on top of the cheese and mushrooms. Flip every 20 seconds or so, taking care to monitor the bread so it does not burn. Remove from heat when cheese is melted, approximately 2 minutes.

Saturday, October 1, 2011

NYC Wine & Food Festival 2011: Burger Bash

When I woke up this morning, I was filled with a sense of dread. Why, you ask? Because tonight, I attended both the Blue Moon Burger Bash, as well as Fried (at Hill Country)...back to back...and if I had remembered anything from yesterday's Meatball Madness, I knew I would be beyond full...from one event alone.

Walking into Burger Bash (early access again - yay, thanks Gilt City!), we were greeted with the aromas of burgers on hot grills, a gentle breeze wafting over from the river, as well as a promising line-up of what would surely be amazing burgers. In order to fully prepare for this event, I had avoided eating burgers for over 2 weeks (a major feat for me), so by now I was ready to dive in!


Burger Bash had slightly fewer participating restaurants than Meatball Madness, but given that we would be served burgers - complete with requisite bun, a.k.a. instant stomach filler - I knew I would have to eat swiftly (so that I would not realize I was full) and wisely (because again, I had another event to attend afterward). First stop: Quality Meats!

The F*ck Fancy Cheese Burger from Quality Meats
Quality Meats served a solid burger, with a satisfying patty and delicious broccoli and cheese bites on the side. I also liked that it was served on something more interesting than a potato bun - bonus points in my book (I really don't like potato buns). To market themselves, Quality Meats handed out pins (both normal and profane) and if you voted for them, you received a t-shirt. Hooray for these extra little special touches!

Knowing that the crowd around Marc Forgione would be enormous, I deftly meandered over to his booth where, thankfully, a line had not yet formed and I was easily able to say hello, grab my burger, and eat in peace. His Hangover Burger was quite intricate and satisfying, even going so far as to include a poached egg, but unfortunately for me, I am absolutely incapable of eating spicy food and had to immediately search for the nearest bottle of water. If I continue attending these food events, I really need to work on my spicy foods tolerance...

The Hangover Burger from Restaurant Marc Forgione
I have no idea what or where Custom Burgers is from, but all I know is that their Americana burger - though exceedingly simple - hit the spot. Plus it helps that a handful of fried pickles were served alongside the burger, allowing me to finally satisfy my curiosity towards this mysterious food (Snooki makes them sound as if they are life-changing) without actually having to buy a portion (especially given that...I'm not a big fan of pickles).

Americana Burger from Custom Burgers
DBGB Kitchen and Bar served a spectacular "Piggie," with the sweetness of the BBQ pulled pork contrasting beautifully against the juicy, salty burger. The surprising part about me liking the burger was that I actually am not traditionally a fan of BBQ pulled pork and usually find the flavors to be overwhelming, but in this burger, all I can say is that DBGB found a way to really make it work.

The Piggie from DBGB Kitchen and Bar
Dropping by Abe & Arthur's, I saw the chefs preparing normal-sized burgers and I have to say, I really panicked. But fortunately, we were served their "Wisconsin" Cheese Burger in the form of sliders and I fairly enjoyed this burger (makes sense, they were chosen by the judges as this evening's winner). But in all honesty, I was more engrossed by the delicious truffle fries served alongside our burger. To me, a good fry will always beat out a good burger.

The "Wisconsin" Cheese Burger from Abe & Arthur's
The people's choice winner went to the B&B Bison Burger from Burger & Barrel. I do remember being served a good burger from them, but...it didn't really stick in my mind. But after eating 20 burgers (and 1 hot dog!), it really becomes quite hard to distinguish the burgers from one another.

Unfortunately, I did encounter a number of let-downs this evening. Biggest one: Bobby's Burger Palace. The burger was dressed well and I loved the addition of potato chips to add a sparkle of texture and liveliness to the burger, but boy was the meat salty.

Carolina Burger Crunchified from Bobby's Burger Palace
 After sampling all the burgers (minus the Shack Burger from Shake Shack because, well, I live and work right outside a Shake Shack), I headed over to the main tent to explore the dessert array. The middle of the room housed a giant spread of pies and milkshakes, but I chose to forego the pies (though I definitely tried the milkshakes). I actually quite liked the milkshakes (provided by Duff Goldman's Shakes) and found the mint julep milkshake to be very satisfying, despite assuming that the addition of alcohol would surely overwhelm any other flavors present.

All in all, this was a very satisfying event and I'm glad I was able to try so many different burgers from around the city. But if I ever attend this event in the future, I will be sure to prepare a consolidated list of max 10 burgers to sample...and force myself to stick with it.